

The shelter is one of the main camping essentials. You need to pack your tent first before anything else. But what if you find yourself in the wild with no backpacking tent?
Building your own tent from scratch might sound like a complicated process, but once you master it, it becomes easy. When you make your own camping tent, it may not keep critters away, but you are protected from elements.
The DIY tent comes in handy if you are ever caught up in a storm, but you forgot your tent at home. There are lots of techniques and materials needed to build a tent, and the process might be more tiring than setting a ready tent. However, if you are stuck in the wild without a tent, you will be glad you learned how to make one from scratch.
Here is how to make your own camping tent:
This is the first step in making your own tent. You need a flat and even ground away from hills and mountains. The campsite should also be away from ditches that might flood the campsite if it rains. Choose a low altitude area to avoid strong winds and cold.
If the campground has trees, choose a site near large trees. Trees block draught, offer shade, and support your tent. However, you need to keep off dead trees as their branches might break and fall on your tent.
Before setting up your tent, you need to remove rocks, leaves, and sticks from the site. You can avoid dust by looking for a spot with short grass, or a little damp. Depending on your reason for camping, you can set up a tent near rivers and lakes to get a great view and go fishing.


Once you make the roof and ensure the corner poles are firm into the ground, proceed to make walls. If your tarp is large, it should extend to form walls on one side of the tent. Use a thicker tarp on the ground to protect you from wet ground or insects.
Hammer the tarp into the ground to align with the tarp that forms the roof. You can tie the corners of the floor tarp into the corner poles, or place large stones to ensure the floor remain stable. Ensure that all knots on the ropes are tight and the tent is well-balanced to keep you protected.
These are the basic steps to follow to make your own camping tent. There are two main methods of making a tent from scratch:
This is among the easiest tents to set by yourself and it requires
For this method, you need to find a campsite in between two trees at least 10 feet apart. Take a rope and tie it tightly in between the two trees at a medium height. The height of the rope from the ground should not exceed a third of the length of the tarp.
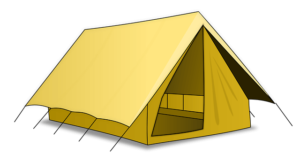
Once your rope is secure, throw the tarp on top of the rope to form a triangular shaped tent. Ensure that the center of the length of the tarp falls on the rope. Again, ensure that the rope is tightly secured on the tree and it runs parallel to the ground to ensure the tarp doesn’t fall.
If you have more than one tarp, cast the largest on top of the rope, ensuring it falls equally on both sides. Make holes on the corners of the tarp using a knife. Secure the tarp to the ground by hammering some sticks into the ground. If you do not have the sticks or a means to hammer them into the ground, place heavy rocks on the corners of the tarp to secure it.
If you have another tarp, you can lay it down to form a tent floor. A heavy and durable tent comes in handy as a tent floor.
If you have few equipment and the campsite is near two strong trees, you can set up this kind of tent. The triangular shape of the tent keeps it protective from bad weather, but critters might still crawl into your tent. For this method to work, you need a large tarp, and your campsite should be in a wooded place.
If you have limited materials and still need an emergency tent, you can make a tent with ease. This one-tree tent is only ideal for emergencies as it is less spacious and less protective of elements. To make this tent, you need:
If you are a beginner for camping or hiking, you need to know the ten essentials here.
© 2021 by OutdoorStuffGudies.com
OutdoorStuffGudies.com is a participant in the Amazon Services LLC Associates Program, an affiliate advertising program designed to provide a means for sites to earn advertising fees by advertising and linking to Amazon.com.